

So, what are we building in Scratch?
The project this tutorial is based on

オセロ入門

What you'll build
#1Judge: Getting the Judge ready to start
Setup
Open the "Judge" sprite
 Judge
Judge| About this sprite |
|---|
| The command-center sprite that runs the whole game, manages the board, and decides the winner. |
| What it does |
| We'll build the judge that manages the rules of mini Reversi. It tracks the game state and whose turn it is, and runs the match between the player and the CPU. |
Build
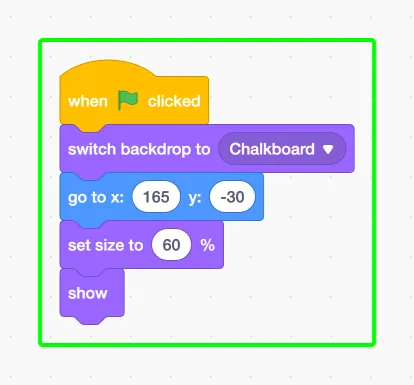
It starts when the flag is clicked with when clicked. We switch the backdrop to the chalkboard and place it at a smallish size near the top-right of the screen.
Finally we make it appear with show. For now we're just tidying up its look—the game rules come next.
#2Cell: Initializing the cell
Setup
Open the "Cell" sprite
 Cell
Cell| About this sprite |
|---|
| The sprite that represents one cell on the board and switches between stone colors and the hint display. |
| What it does |
| We'll clone 16 board cells and line them up. When a stone is placed the cell changes color, and playable cells light up as a hint. |
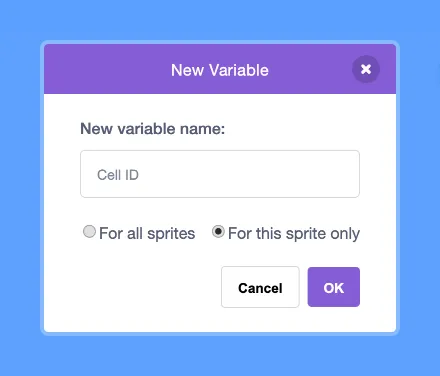
Add the "Cell ID" variable
The cell number assigned to this clone.
Build
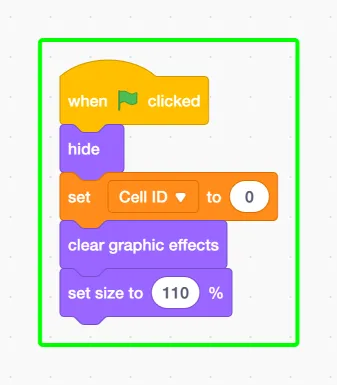
When the flag is clicked, we hide the original for now with hide. We set "Cell ID" to 0 and reset the graphic effects too.
The original is only the source for the clones, so it never shows on screen. What actually lines up on the board are the clones we'll make later.
#3Start Button: Placing the button
Setup
Open the "Start Button" sprite
 Start Button
| About this sprite |
|---|
| The button sprite that controls starting the game. |
| What it does |
| We'll build a start button that begins the game when pressed. It hides during the game and shows again when it ends. |
Build
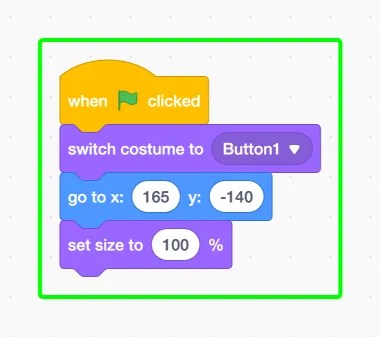
It starts on the flag with when clicked. We switch to the button costume and put it just below the Judge.
#4Start Button: Showing the button
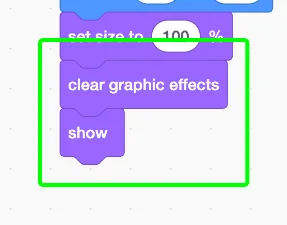
After resetting the effects, we show it with show. Now the start button is ready to be pressed.
#5Judge: Initializing the game state
Setup
Open the "Judge" sprite
Add the "Game State" variable
A variable that tracks the game's progress (0 = title, 1 = playing, 2 = over).
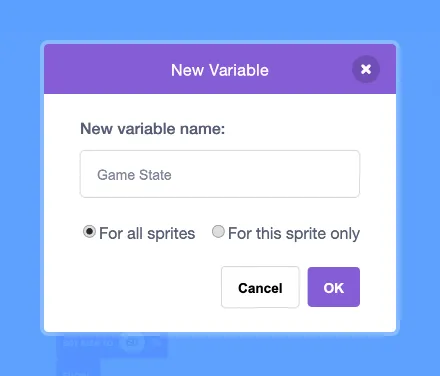
Add the "Turn" variable
A variable that tracks whose turn it is (1 = the blue player, 2 = the pink CPU).
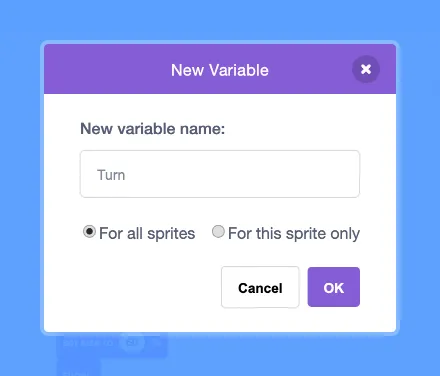
Add the "Move Done" variable
A variable that shows whether the player has finished their move.
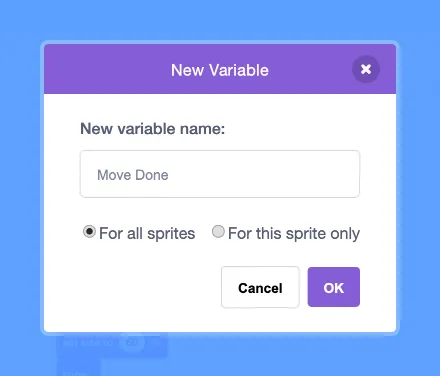
Add the "Pass Count" variable
A variable that counts how many passes have happened in a row.
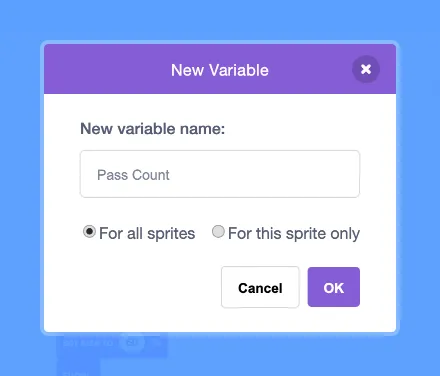
Add the "Clicked Spot" variable
A variable that holds the number of the cell that was clicked.
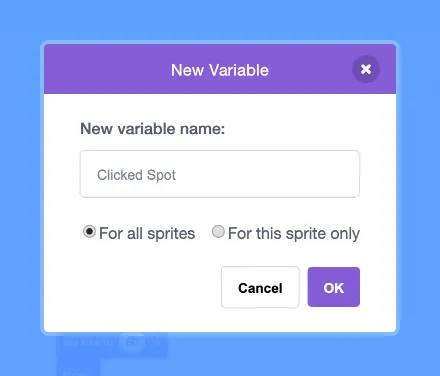
Build
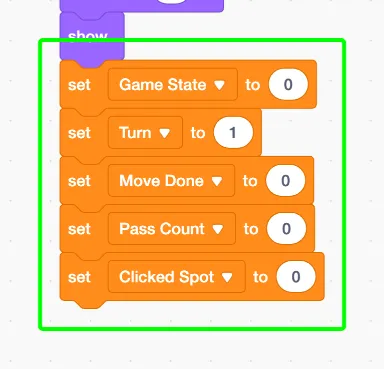
With set ( ) to ( ) we set "Game State" to 0 (the title screen). We line up initial values like turn = 1 so the blue player goes first.
"Move Done", "Pass Count", and "Clicked Spot" all go to 0 too. We manage the flow of the game with numbers, and sprites all over the place watch these numbers to decide what to do.
#6Judge: Preparing the direction list
Setup
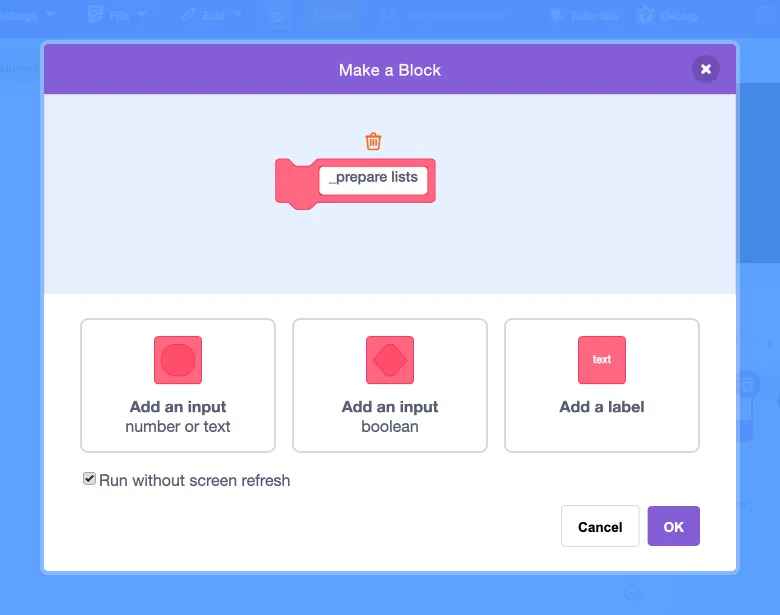
Add the "_prepare lists" custom block
Sets up the directions list and the corner spots list.
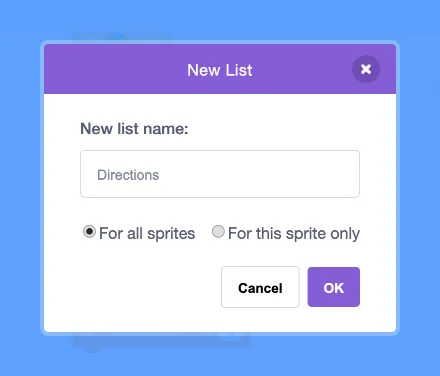
Add the "Directions" list
A list of movement amounts used to check all 8 directions on the board.
Build
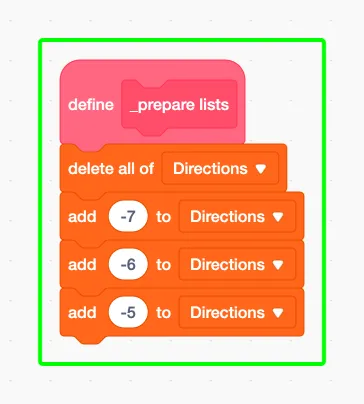
With define ( ) we make a custom block called "_Set Up Lists". We empty out "Directions" for now and add -7, -6, -5.
These numbers stand for "how far one step moves" on the board. Because we hold the board as a single list, a direction can be expressed with just one number. It'll make sense when we build the board.
#7Judge: Completing all 8 directions
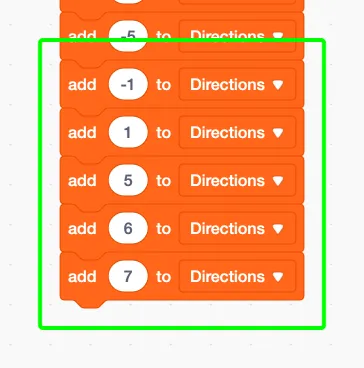
That makes 8 in total. Up-down, left-right, and diagonal—every direction is now covered by a single number each.
For example, 1 means one cell to the right, 6 means one cell down, and 7 means a diagonal step to the lower-right. Once directions are gathered in a list, we can check every direction later just by looping 8 times.
#8Judge: Registering the corner cells
Setup
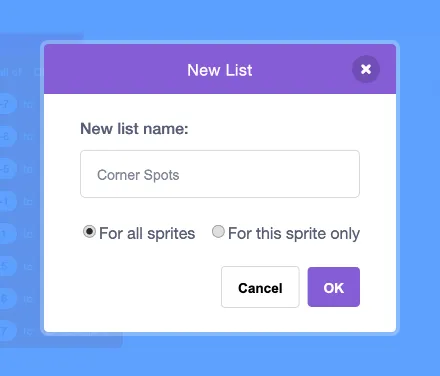
Add the "Corner Spots" list
A list of the cell numbers at the corners of the board.
Build
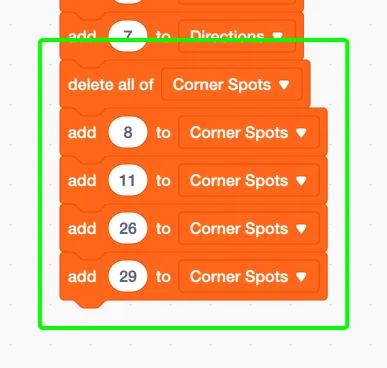
In Reversi the corners are incredibly strong cells. Later the computer uses this list to decide to "aim for the corners first".
#9Judge: Making the board container
Setup
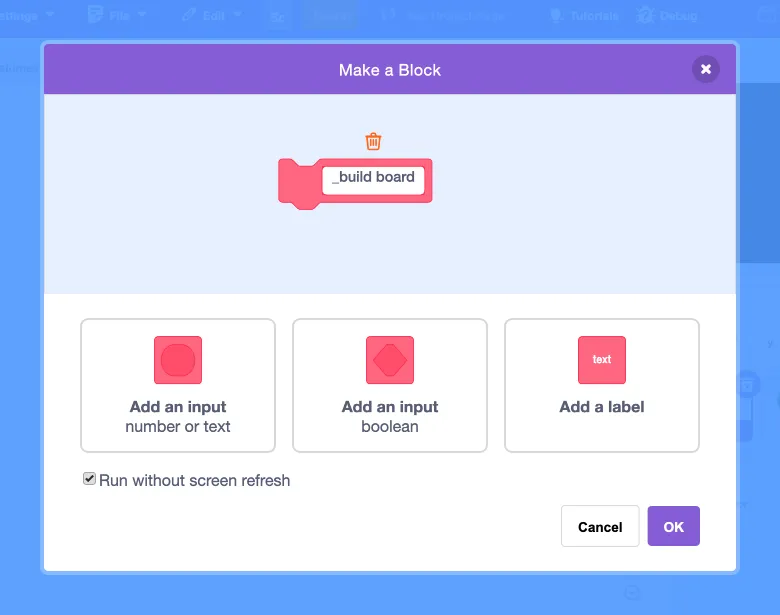
Add the "_build board" custom block
Builds the board and sets the starting layout.
Add the "Board" list
A list that holds the state of all 36 cells on the board.
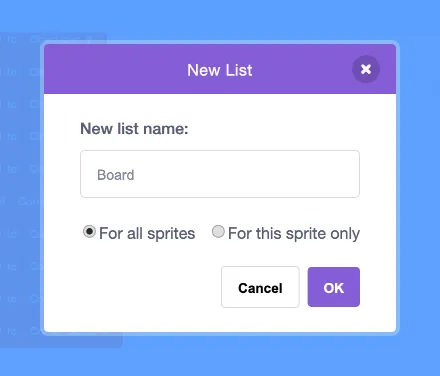
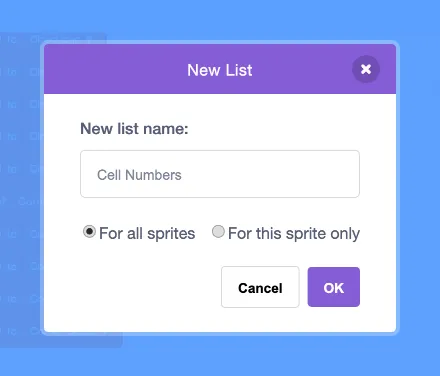
Add the "Cell Numbers" list
A list of the 16 playable cell numbers on the board.
Build
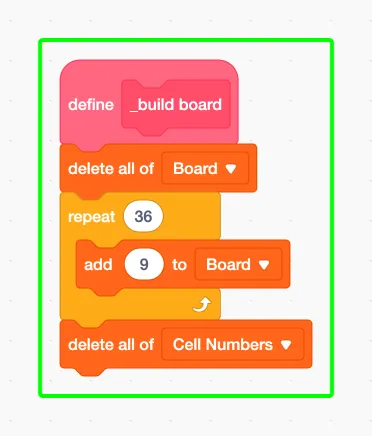
From here we make the "_Build Board" block that creates the board itself. First we empty "Board", then with repeat ( ) we add the number 9 thirty-six times.
The board we play on is 4×4, so why 36 cells (6×6)? It's actually to wrap a "wall" all the way around the outside. This 9 is the mark for a wall.
By filling the outer ring with walls, a line scanning for stones naturally stops the moment it steps off the board. That saves us from checking "did we go out of bounds?" every time—a clever technique called a sentinel. We also empty "Cell Numbers" here.
#10Judge: Looping over rows and columns
Setup
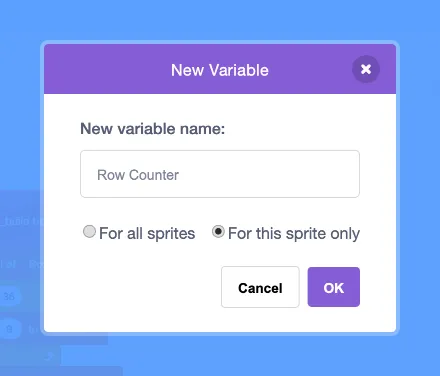
Add the "Row Counter" variable
The row counter used while building the board.
Add the "Column Counter" variable
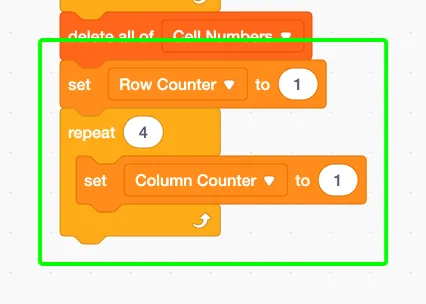
The column counter used while building the board.
Build
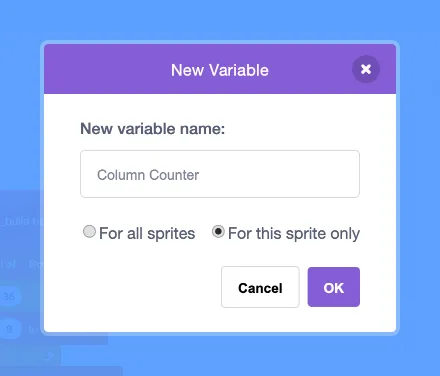
With repeat ( ) we loop for the 4 vertical rows, and inside it we reset "Column Counter" to 1. With this double loop of rows and columns, we process the 4×4 cells in order.
#11Judge: Calculating cell numbers
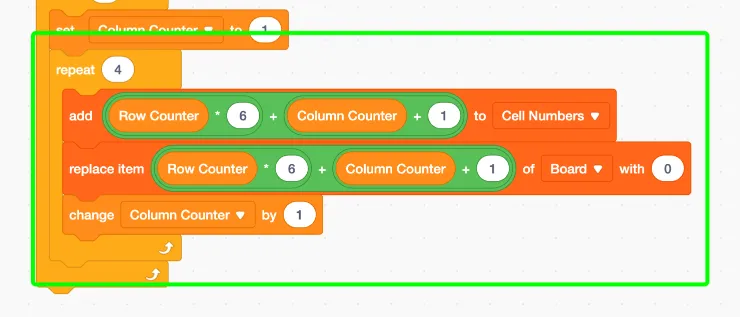
In the inner loop, we calculate each cell's "number". We spin 4 columns across with repeat ( ).
The number comes from "row × 6 + column + 1". We add this to "Cell Numbers" and rewrite the "Board" at that spot to 0 (empty).
Even with a single list, combining multiplication and addition lets us represent 2D coordinates. Once the calculation is done, we add 1 to "Column Counter" and move to the next cell.
#12Judge: On to the next row
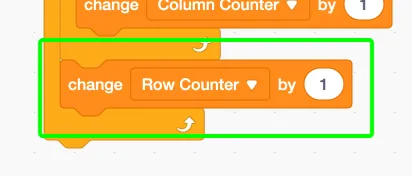
Repeating this sets a number and an empty state on all 16 cells. It's like the outer part of the double loop advancing one lap.
#13Judge: Placing the first stones
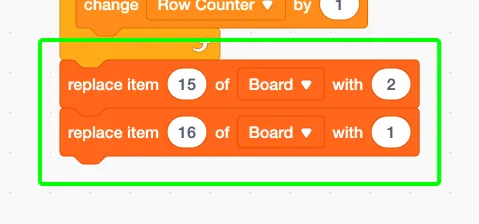
These two, plus two more in the next step, make the diagonal pattern in the center. It becomes the standard shape at the start of a game.
#14Judge: Finishing the starting layout
Setup
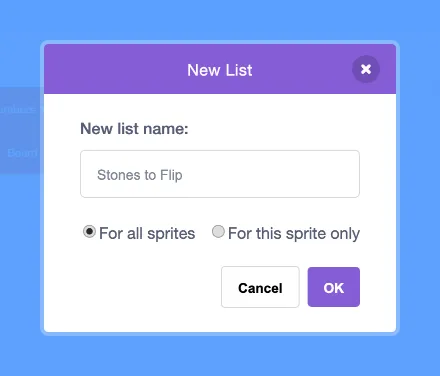
Add the "Stones to Flip" list
A list of the cells to flip when a stone is placed.
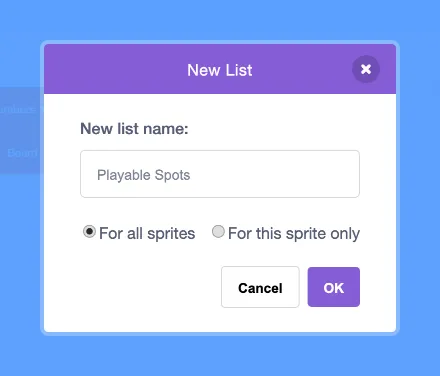
Add the "Playable Spots" list
A list of the cell numbers where a stone can currently be placed.
Build
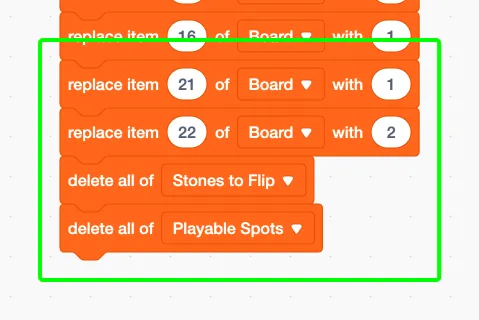
Now blue and pink each have two stones diagonally facing each other—the Reversi-style starting shape is complete.
Finally we empty and reset "Flip List" and "Playable Cells". That's cleanup so the previous state isn't carried over into the next game.
#15Judge: Getting ready to count stones
Setup
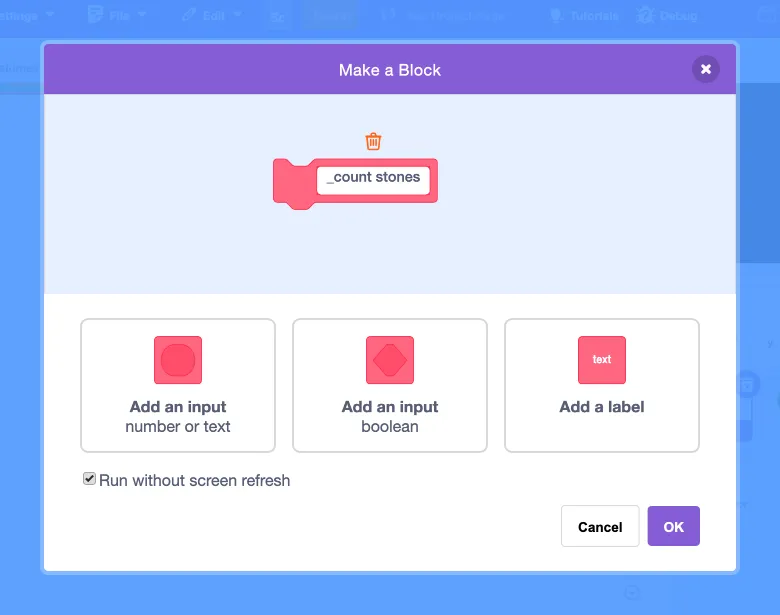
Add the "_count stones" custom block
Counts the number of blue and pink stones.
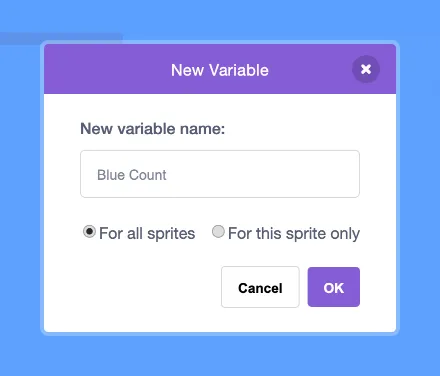
Add the "Blue Count" variable
The number of blue stones on the board.
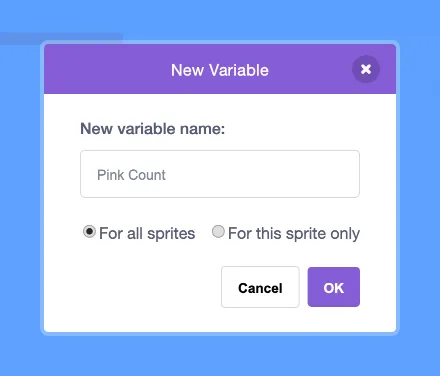
Add the "Pink Count" variable
The number of pink stones on the board.
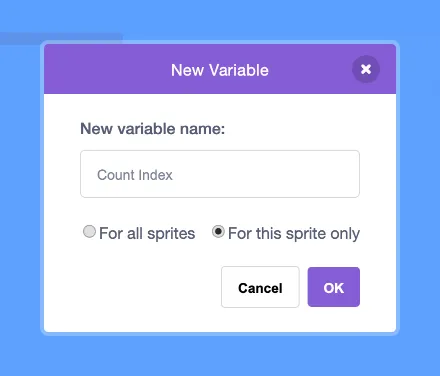
Add the "Count Index" variable
The loop index used to count stones.
Build
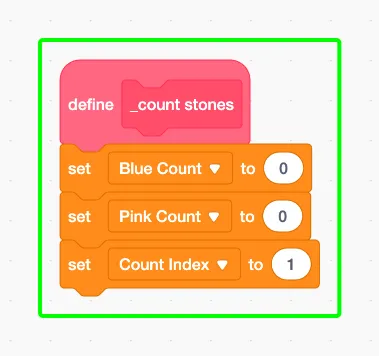
We reset "Blue Count" and "Pink Count" to 0 for now. "Count Number", which marks the position we're counting, also starts from 1.
#16Judge: Counting the blue stones
Setup
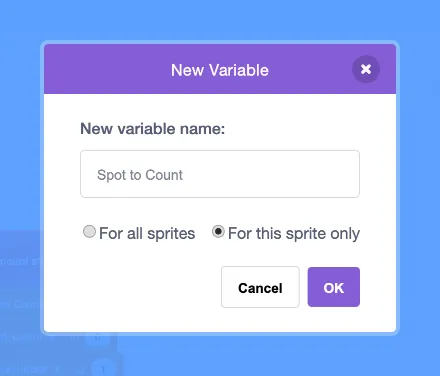
Add the "Spot to Count" variable
The cell number whose stone is being counted.
Build
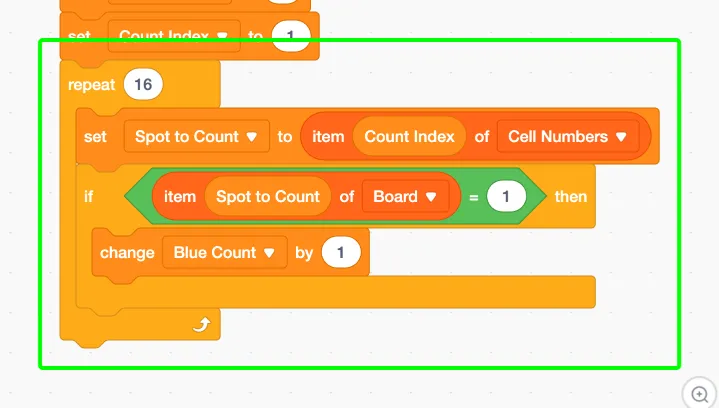
With repeat ( ) we loop over the 16 cells, checking the contents one cell at a time.
We take the number of the cell we're looking at from "Cell Numbers", and if its "Board" value is 1 (blue), we add 1 to "Blue Count" with change ( ) by ( ).
#17Judge: Counting the pink stones
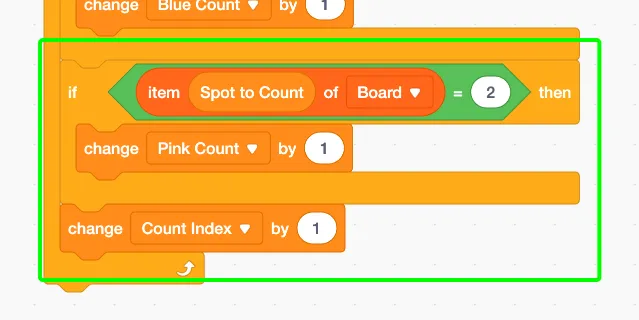
Once we've checked, we advance "Count Number" by 1 and move to the next cell. Going through all 16 cells gives us the totals for both colors.
#18Judge: Bundling the initialization
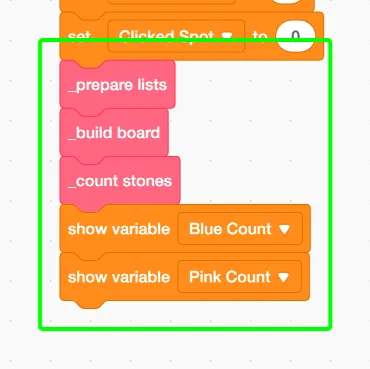
We call the prep blocks we've built all together. With ( ) we run "_Set Up Lists" → "_Build Board" → "_Count Stones" in order.
This order quietly matters. We can't count stones unless we've prepared the directions and the board first.
Finally we show "Blue Count" and "Pink Count" on screen. That keeps the score visible throughout the match.
#19Judge: Sending the start signal
Setup
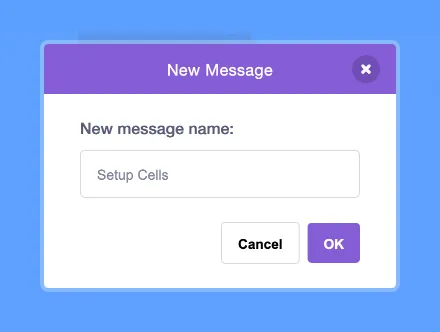
Add the "Setup Cells" message
A message that tells the cells to set themselves up.
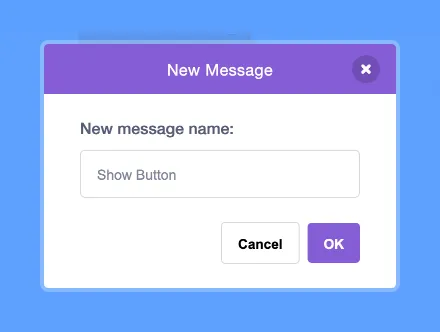
Add the "Show Button" message
A message that shows the start button.
Build
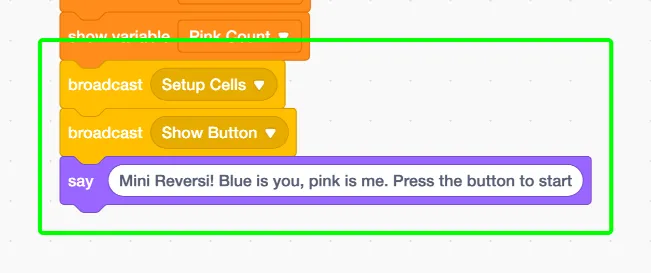
With broadcast ( ) we send "Set Up Cells" and "Show Button". Lining up the cells and showing the button are handled by whoever receives the signal.
Finally, with say ( ) we greet the player with the rules, introducing the opponent with something like "Blue is you, pink is me."
#20Cell: Starting to spawn cells
Setup
Open the "Cell" sprite
Add the "Placement Row" variable
The row position used when arranging the clones.
Build
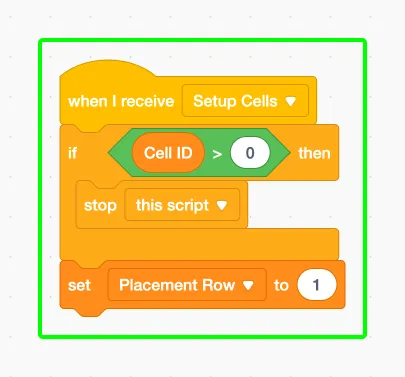
It springs into action when it receives "Set Up Cells" via when I receive ( ). But when "Cell ID" is greater than 0, we halt it with stop.
This is a stopper that prevents clones from also receiving the signal and multiplying out of control. Only the original does the laying-out work—that's the split of duties.
#21Cell: The row loop for laying out
Setup
Add the "Placement Column" variable
The column position used when arranging the clones.
Build
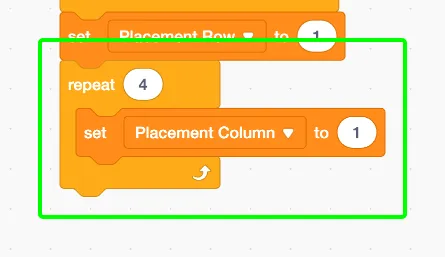
With repeat ( ) we spin the 4 vertical rows, and inside it we reset "Place Column" to 1 each time. It's the same double-loop shape as when we built the board.
#22Cell: Cloning the cells
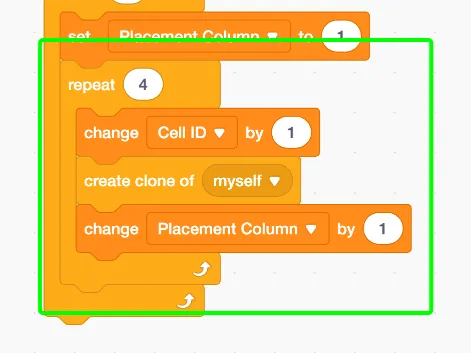
In the inner loop, we actually make the cell clones. We spin 4 columns across with repeat ( ).
We add 1 to "Cell ID", then create a clone of ourselves with create clone of ( ). Clones are born one by one, each with a serial number.
After making one, we advance "Place Column" by 1 and move to the next. Repeating this lines up 4 cells per row.
#23Cell: On to the next row's cells
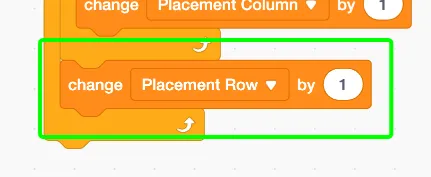
When the outer loop runs 4 laps, we get 16 cells in total, 4×4.
#24Cell: Resetting the original's number
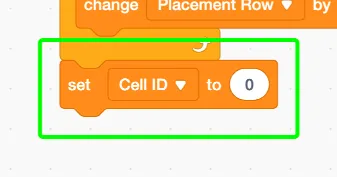
This keeps the original as "ID 0 = the layout role". The clones numbered 1 to 16 are the ones that actually light up on the board—that division of roles is preserved.
#25Cell: Waking up the clones
Setup
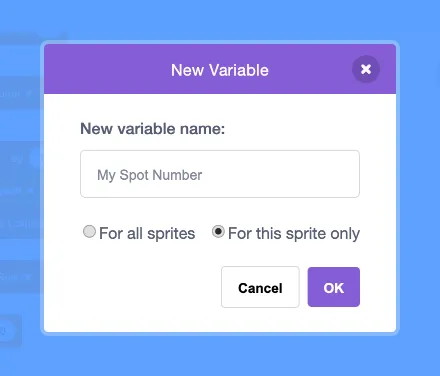
Add the "My Spot Number" variable
The board cell number that this clone corresponds to.
Build
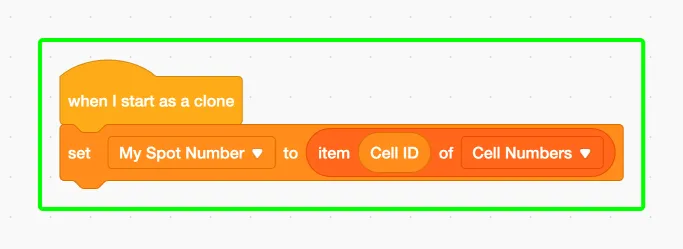
From here we build what each newly born clone does. It starts the moment it wakes up as a clone with when I start as a clone.
First, using its own "Cell ID", it pulls its assigned cell from "Cell Numbers" and records it in "My Spot". Since each clone holds a different number, they can each take charge of a different cell.
#26Cell: Placing the cell and showing it
Setup
Add the "Last Value" variable
The state of this cell the last time it was checked.
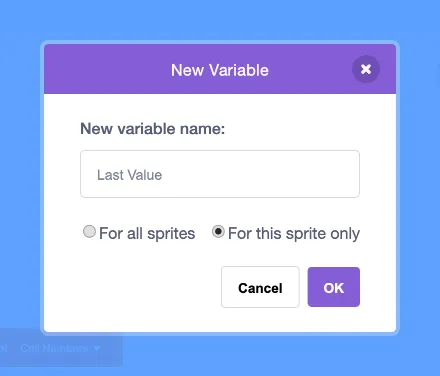
Build
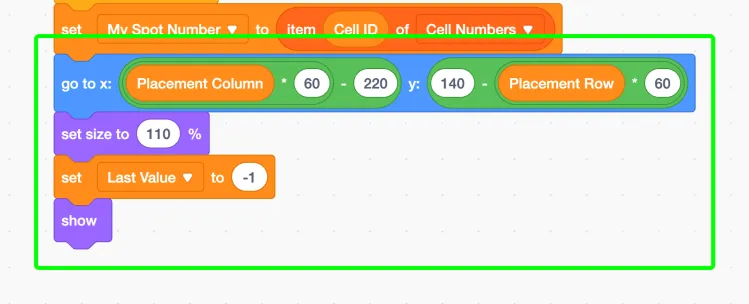
Once its assignment is set, it moves to that spot on screen. It calculates coordinates from "Place Column" and "Place Row" and drops right into place with go to x: ( ) y: ( ).
We set the size to 110 and set "Last State" to -1. That's the mark for "haven't looked even once yet." When it's ready, we show it with show.
#27Cell: Watching the board
Setup
Add the "Now Value" variable
The state of this cell being checked right now.
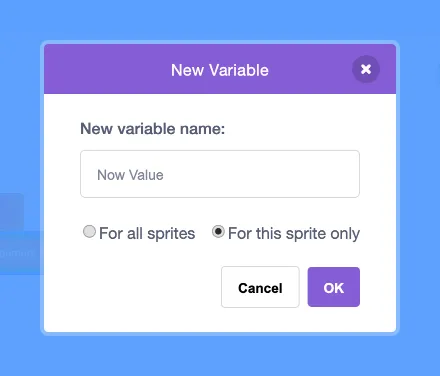
Build
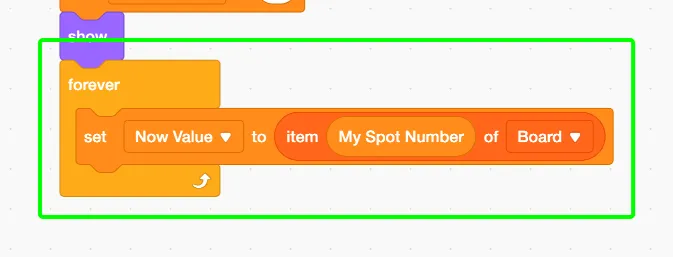
This is the heart of each cell. With forever it keeps watching its own assigned cell forever.
Every time, it reads its cell's contents from "Board" and puts them into "Current State". Whether a stone was placed or it's empty, it receives that in real time.
The Judge just rewrites the board list, and each cell goes and matches its own look on its own. No need to send commands one at a time—it's a clever design.
#28Cell: Growing when a stone changes
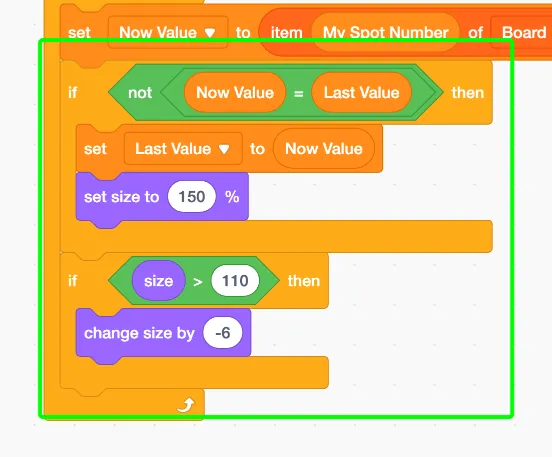
Only the instant a cell's state differs from last time, we add an effect. With if ( ) then we check whether "Current State" and "Last State" differ.
If they differ, we update the record and pop the size up to 150. The moment a stone is placed, it puffs up big.
After that, while the size is bigger than 110, we shrink it little by little by -6. Grow, then gradually shrink—that makes an anime-like motion.
#29Cell: Showing the blue stone
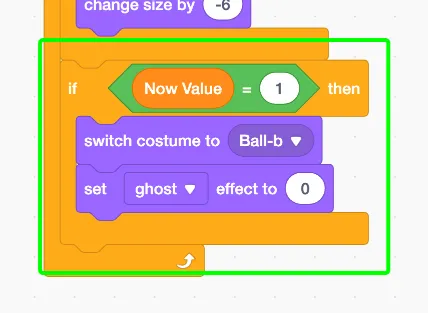
We switch the look based on what we watched. If "Current State" is 1 (blue), we change to the blue stone costume with switch costume to ( ).
We set the ghost effect to 0 to show it clearly. Now a cell where blue was placed really looks like a blue stone.
#30Cell: Showing the pink stone
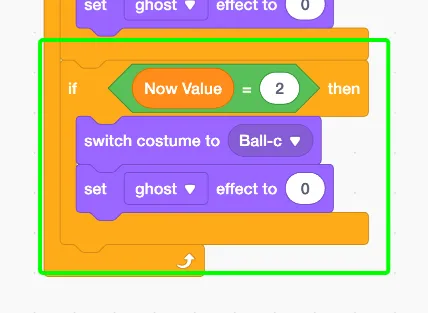
This one's crisp at ghost effect 0 too. It's built just like the blue one, so it's like a clone in a different color.
#31Cell: Lighting up the playable cells
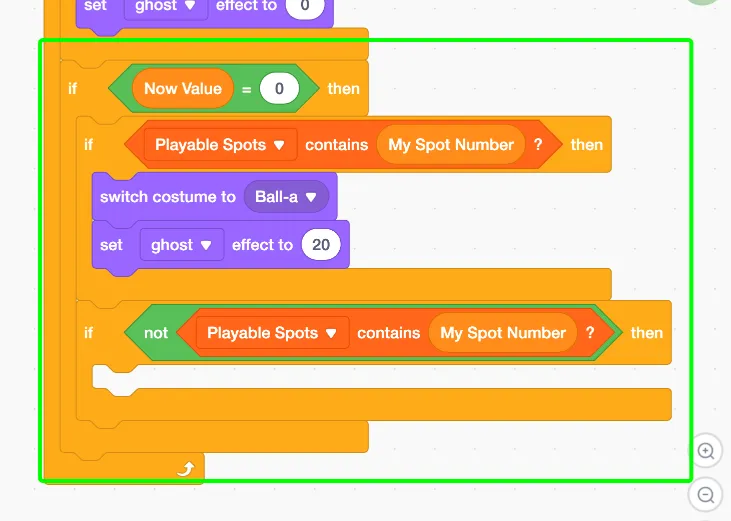
For an empty cell (state 0), we do something a little clever. With if ( ) then we check whether we're in "Playable Cells".
If we are, that's the signal for "you can place here now." We switch to the hint costume and light it faintly by setting the ghost effect to 20.
#32Cell: Dimming the empty cells
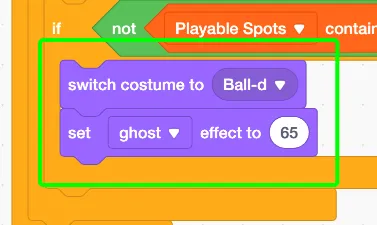
That's pretty see-through, so it blends into the board's background. Only the playable cells stand out, so you can tell where to play at a glance.
#33Start Button: Re-showing the button
Setup
Open the "Start Button" sprite
Build
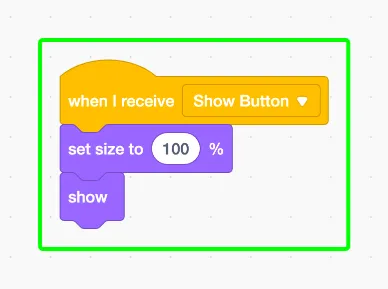
When it receives "Show Button" via when I receive ( ), it sets the size to 100 and shows it with show. Before the game starts or after a reset, it becomes pressable again.
#34Start Button: When the button is pressed
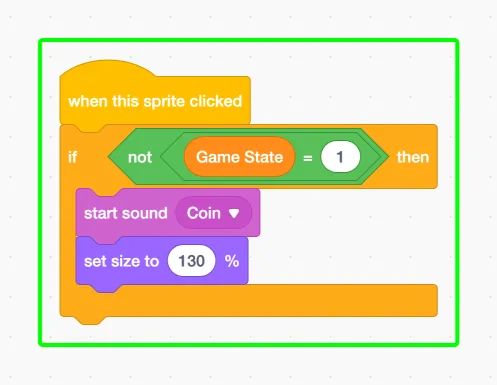
We build the reaction for when the button is pressed. We catch the click with when this sprite clicked.
But with if ( ) then it only reacts when "Game State" is not 1 (in a match). That's a guard so it won't start if it's accidentally pressed during a match.
If it's OK, it plays the "Coin" sound and pops the size up to 130. That's an effect to give a sense of "press".
#35Start Button: Sending the game-start signal
Setup
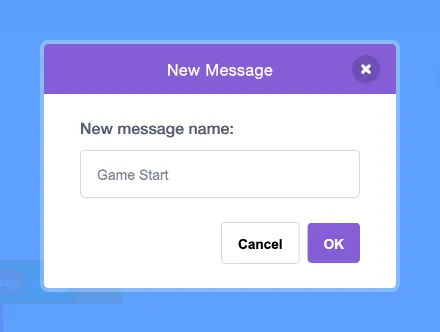
Add the "Game Start" message
A message that tells the Judge the game has started.
Build
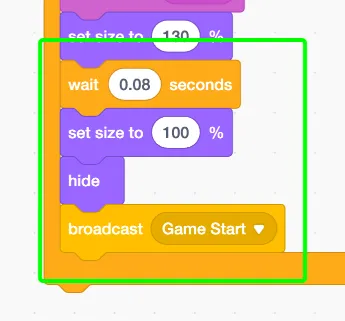
After that we hide the button with hide and send "Start Game" with broadcast ( ). From there, the Judge that receives it sets up the match.
#36Judge: Setting up the match
Setup
Open the "Judge" sprite
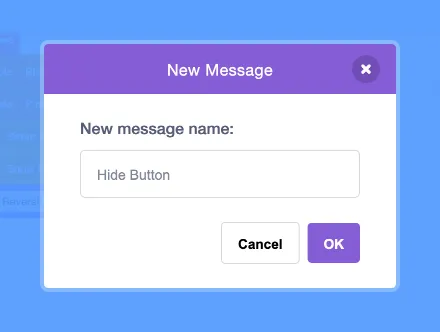
Add the "Hide Button" message
A message that hides the start button.
Build
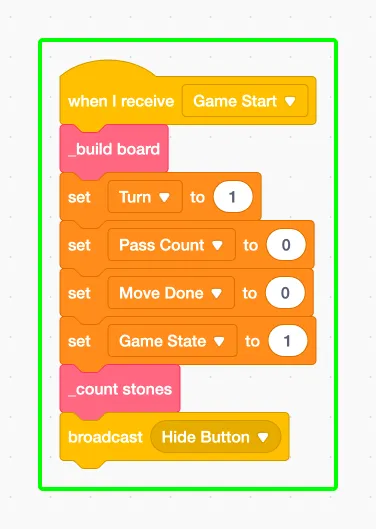
With the button handled, next we return to the Judge. When the signal arrives, the Judge gets the match ready. It starts by receiving "Start Game" via when I receive ( ).
It wipes the board clean with "_Build Board", sets the turn to 1 (blue), and resets the pass count and move-done to 0. Then it sets "Game State" to 1 to switch into match mode.
It recounts the stones and sends "Hide Button" with broadcast ( ). This is what lets you restart as many times as you like.
#37Start Button: Hiding the button
Setup
Open the "Start Button" sprite
Build
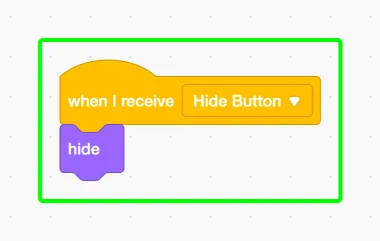
The Judge is prepped, so next we go back to the button side. When the "hide" signal comes, the button slips away. It receives "Hide Button" via when I receive ( ).
Its simple job is just to hide with hide. It disappears so it won't be in the way during the match—a thoughtful touch.
#38Judge: Finding stones to flip
Setup
Open the "Judge" sprite
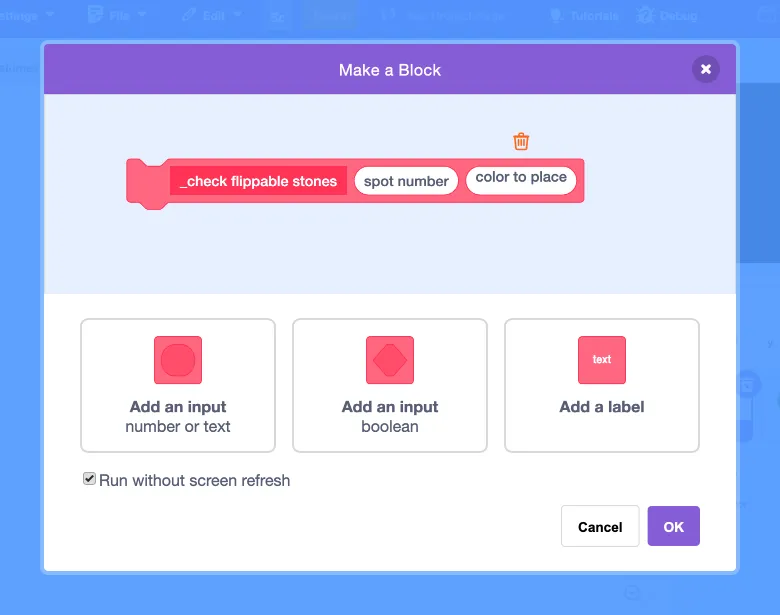
Add the "_check flippable stones" custom block
Checks which stones can be flipped if a stone is placed on the given cell, and adds them to Stones to Flip.
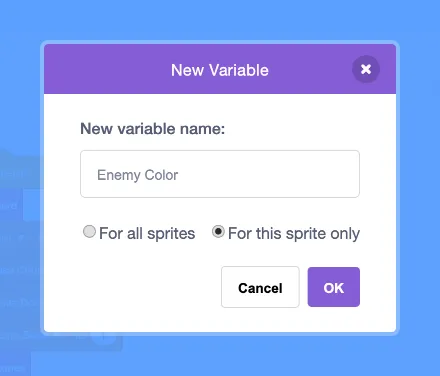
Add the "Enemy Color" variable
The opponent's color, used when checking which stones to flip.
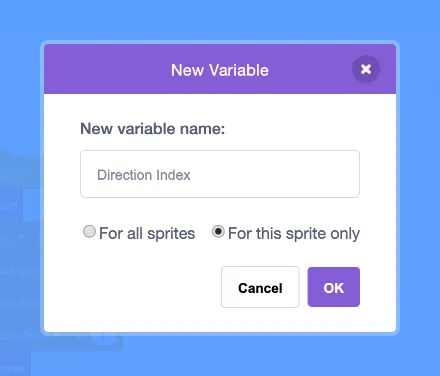
Add the "Direction Index" variable
The loop index used to check all 8 directions.
Build
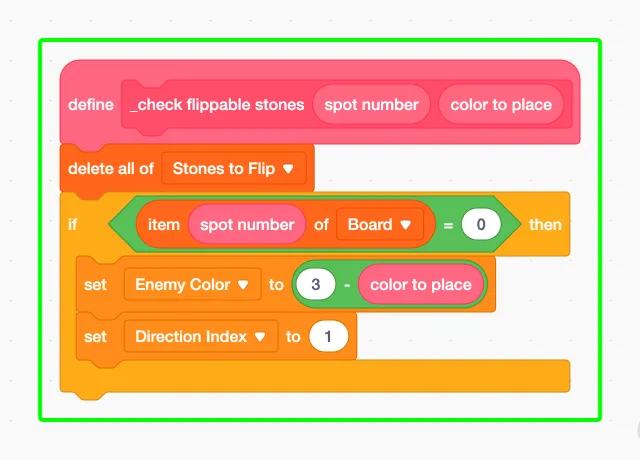
It runs on a "cell number" and "placing color" it receives. First we empty "Flip List", and with if ( ) then we only investigate when that cell is empty (0).
We get the "Enemy Color" from "3 - placing color". Since blue is 1 and pink is 2, subtracting from 3 gives the other one—a neat little trick. We also set the number that traces a direction to 1.
#39Judge: Checking all 8 directions
Setup
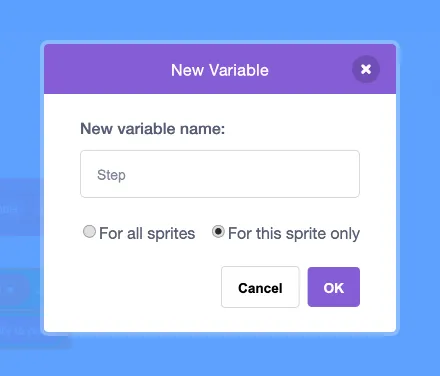
Add the "Step" variable
The amount of movement for one step in the direction being checked.
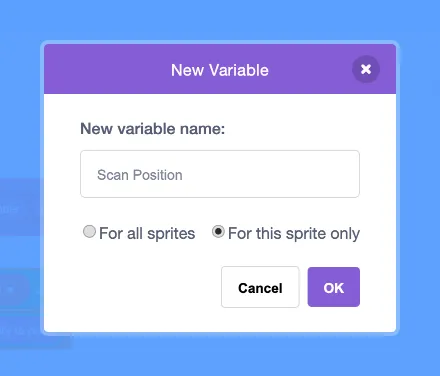
Add the "Scan Position" variable
The position being scanned while checking whether stones can be flipped.
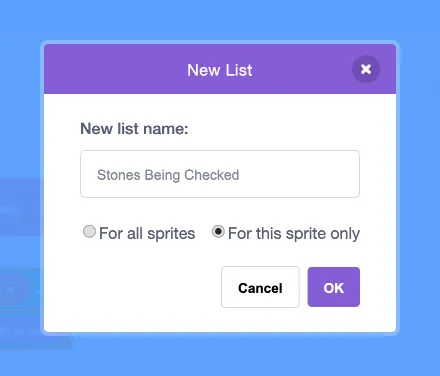
Add the "Stones Being Checked" list
A list that temporarily holds the stones being checked to see if they can be flipped.
Build
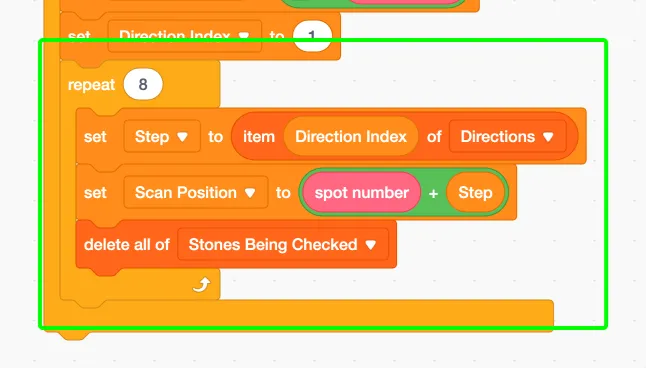
Here the direction list really shows its worth. With repeat ( ) we loop 8 times, investigating the 8 directions in order.
Using "Direction Number", we take this round's move amount from "Directions" and set "Scan Position" to the spot one step forward from the placed cell. We also empty "Scanning Stones", which holds the stones under investigation.
#40Judge: Counting the opponent's stones
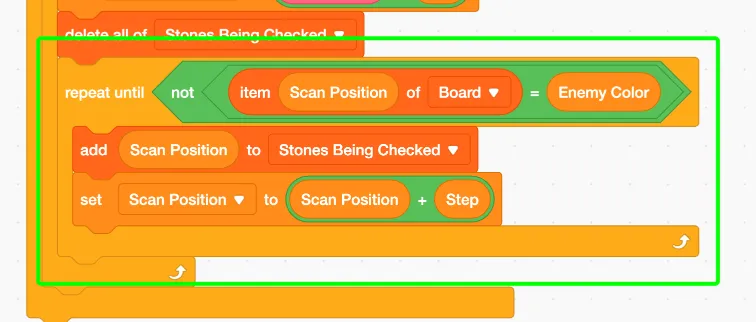
We go straight in the chosen direction as long as the opponent's stones continue. With repeat until ( ) we repeat until "Scan Position" is no longer the enemy color.
Each time we find an opponent's stone, we note its spot in "Scanning Stones" and take another step in the same direction. Even if we go off the board here, the outer ring is a wall (9), so it won't match the enemy color and we stop naturally.
#41Judge: Confirming when we can sandwich
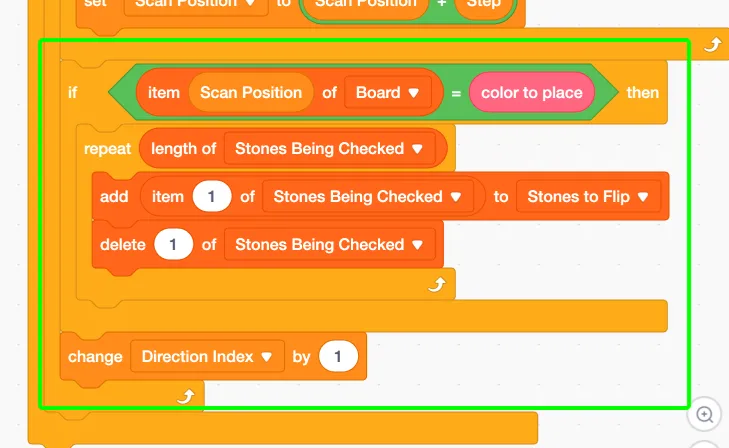
If the spot past the traced opponent stones is our own color, the sandwich is valid. With if ( ) then we check whether "Scan Position" equals the "placing color".
If it's valid, we move all the stones we just noted into "Flip List". That confirms the stones that flip in this direction.
You can only flip when you sandwich the opponent and close it off with your own color—that's the rule of Reversi itself. Finally we advance the direction number by 1 to the next direction. Once all 8 directions are done, this block is complete.
#42Judge: Finding the playable cells
Setup
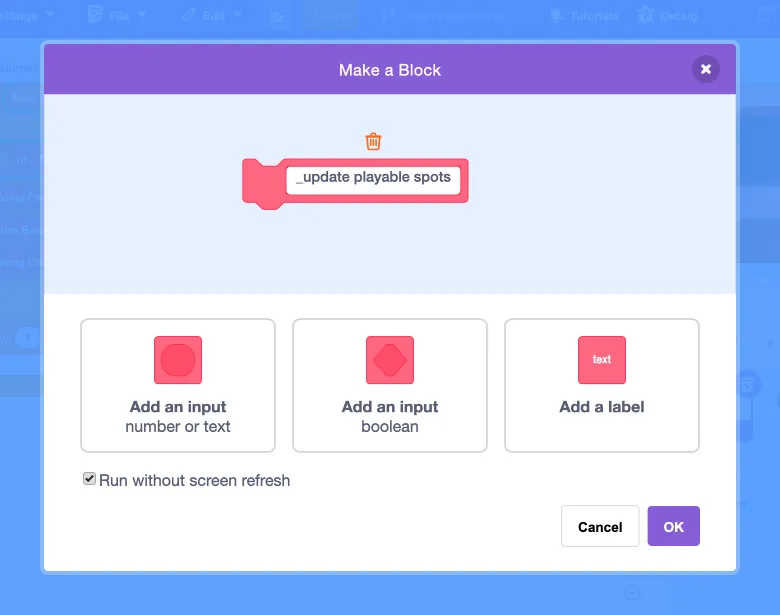
Add the "_update playable spots" custom block
Checks which cells can currently be played and updates Playable Spots.
Add the "Hint Check Index" variable
The loop index used to check which cells can be played.
Add the "Spot to Check" variable
The candidate cell number being checked for a legal move.
Build
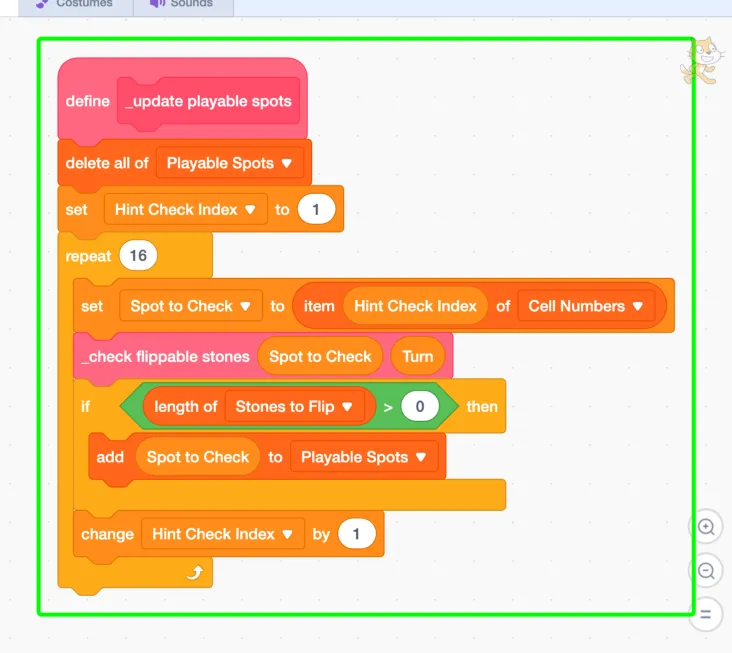
We empty "Playable Cells" and loop over the 16 cells with repeat ( ). For each cell, we call "_Check Flippable Stones" and try it with the current turn.
If the resulting "Flip List" has even one stone, that spot is playable. We confirm with if ( ) then and add it to "Playable Cells". The hints that lit up the cells earlier were watching this list.
#43Cell: Accepting cell clicks
Setup
Open the "Cell" sprite
Build
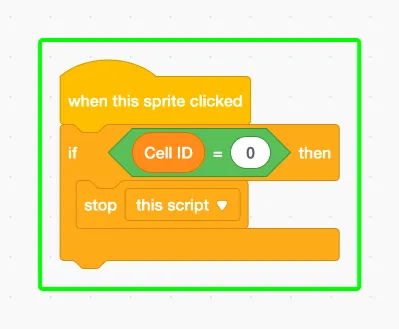
We catch the click with when this sprite clicked. But the original with "Cell ID" 0 is ignored with stop. Only the clones lined up on the board respond.
#44Cell: Checking the conditions to play
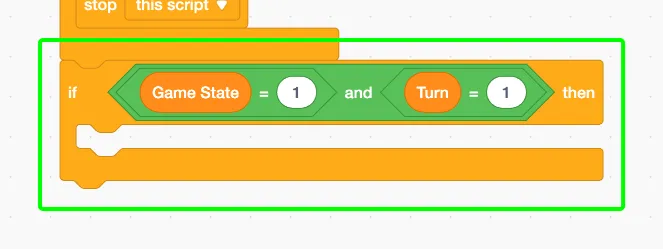
Even when clicked, you can't always place. With if ( ) then we narrow the conditions.
It only accepts when "Game State" is 1 (in a match) and "Turn" is 1 (the blue player). We judge whether both conditions hold at once with ( ) and ( ). It's a guard so the computer's turn can't be hijacked.
#45Cell: Telling the Judge about the click
Setup
Add the "Cell Clicked" message
A message that tells the Judge that a cell was clicked.
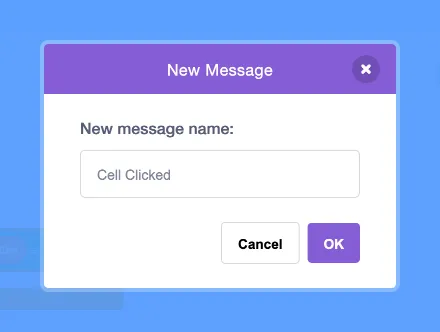
Build
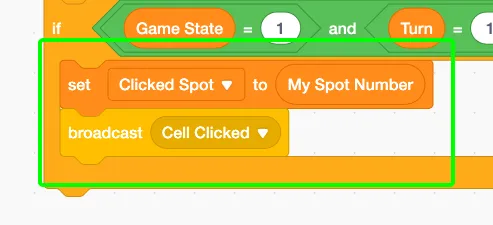
After that we send "Cell Clicked" with broadcast ( ). From there the Judge looks at this number and carries out placing the stone. The cell does the pressing, the Judge does the deciding—that's the teamwork.
Wrap-up
You should now be comfortable representing a board as a 1D list and handling all 8 directions at once with an offset array. Using a sentinel value to skip boundary checks is a quietly powerful trick too. The CPU's scoring logic carries over to other board games, so try applying it in your own projects.